สวัสดีครับ บทความนี้จะมาแนะนำการ Query ข้อมูลจาก MySQL Database มีวัตถุประสงค์คือการให้ บอร์ด ESP8285 สามารถทำการ Select ข้อมูลจากฐานข้อมูล MySQL ตามเงื่อนไขที่กำหนด ซึ่งค่าที่ได้สามารถนำไปแสดงผลหรือใช้งานต่อ เช่นการทำระบบทาบบัตร RFID เพื่อการยืนยันตัวตนว่าบัตรที่ทาบนั้นมีอยู่ในระบบหรือไม่ หรือการทำระบบเช็คยอดเงินคงเหลือในบัตร เมื่อผู้ใช้งานนำบัตรเงินสดมาทาบกับเครื่องอ่านก็ให้ทำการตรวจสอบยอดเงินคงเหลือจากฐานข้อมูล เพื่อแจ้งแก่ผู้ใช้งานต่อไป
หมายเหตุ: ในบทความนี้จะเป็นการติดต่อกันระหว่าง NodeMCU ESP8285 กับ Mysql Server โดยตรง โดยไม่ใช่การส่งข้อมูลหรือเรียกข้อมูลด้วยไฟล์ PHP แต่อย่างใด
ก่อนการเริ่ม เรามาตรวจสอบสิ่งที่ต้องมีกันก่อน
- บอร์ด ESP8285
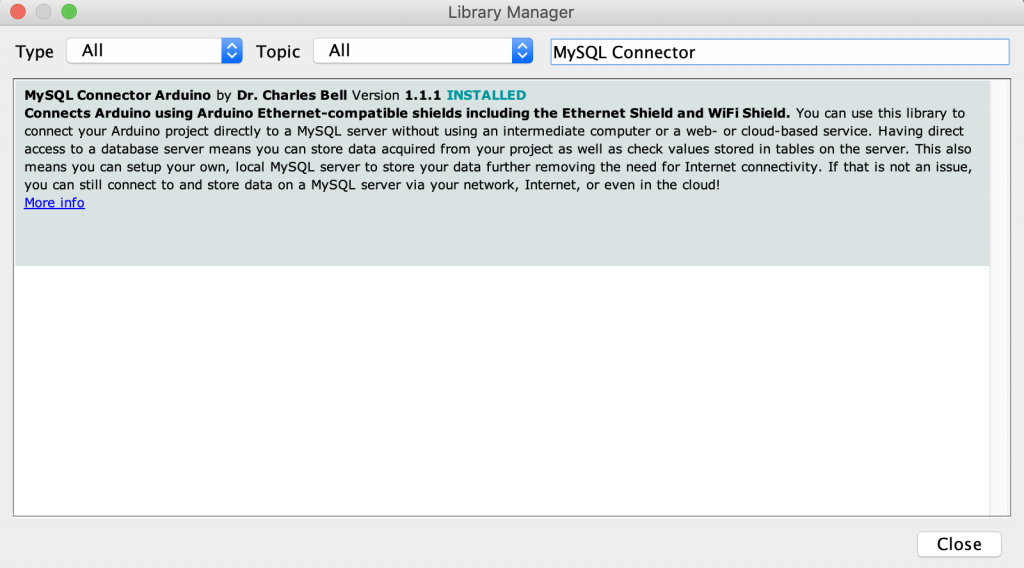
- Library MySQL_Connector_Arduino
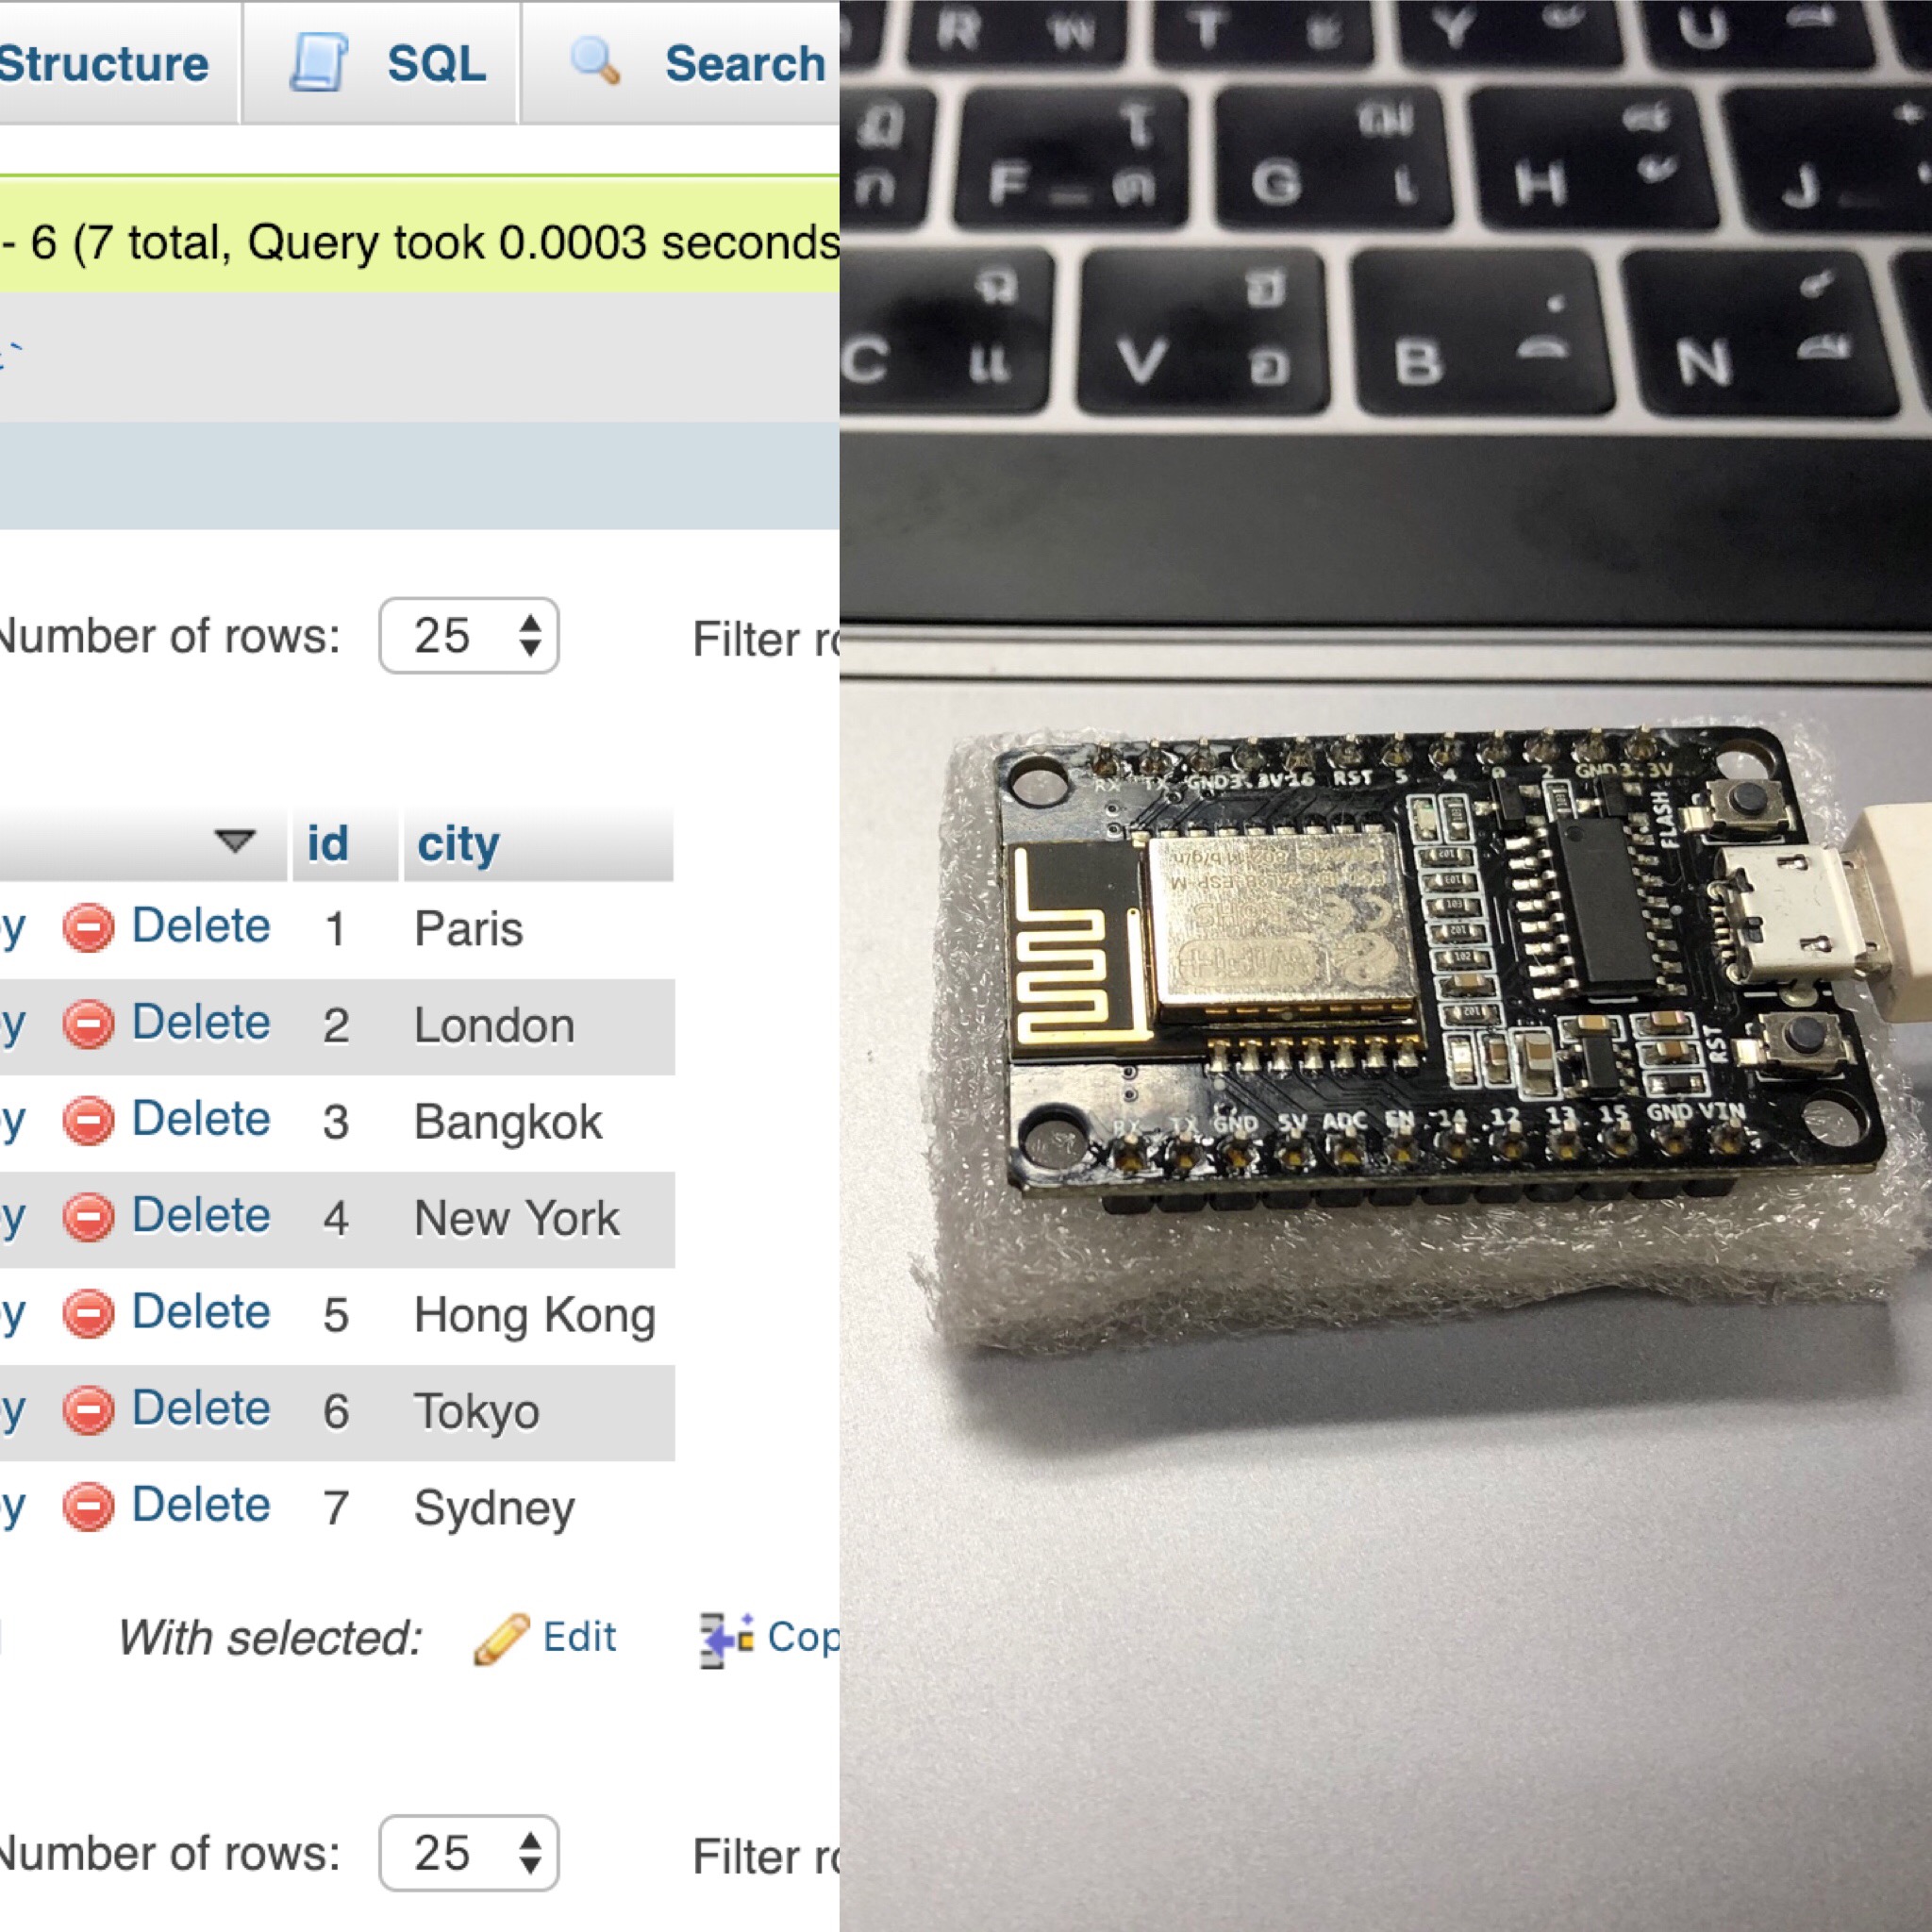
- ฐานข้อมูล MySQL สามารถจำลองสร้างแบบ local host หรือหากใช้งานจริงๆ ก็สั่งซื้อ Cloud Hosting จาก www.plathong.net ได้นะครับ (เนียนขายของ)
เมื่อทุกอย่างพร้อมก็มาเริ่มดูโค้ดไปทีละส่วนกันเลยครับ เริ่มจากส่วนแรกคือการตั้งค่า WiFi และ ข้อมูลการเชื่อมต่อ MySQL Server
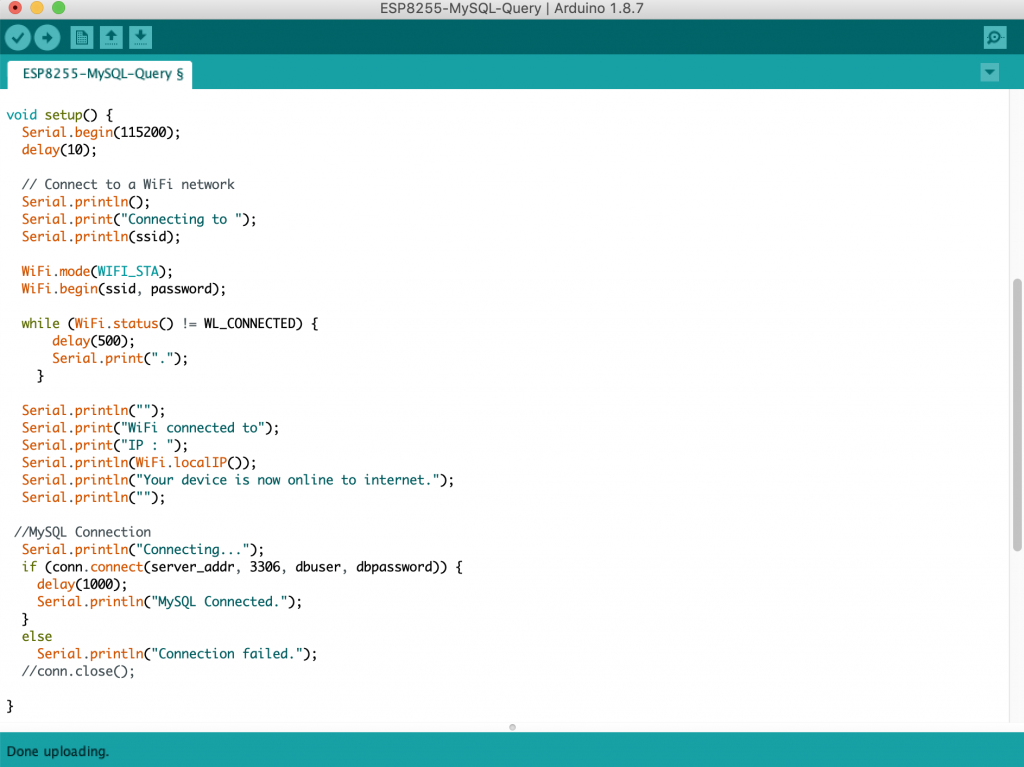
โค้ดส่วนถัดไปจะเป็น void setup ซึ่งจะเป็นการเชื่อมต่อ WIFI และการ Connect ไปยัง MySQL Server นั่นเอง
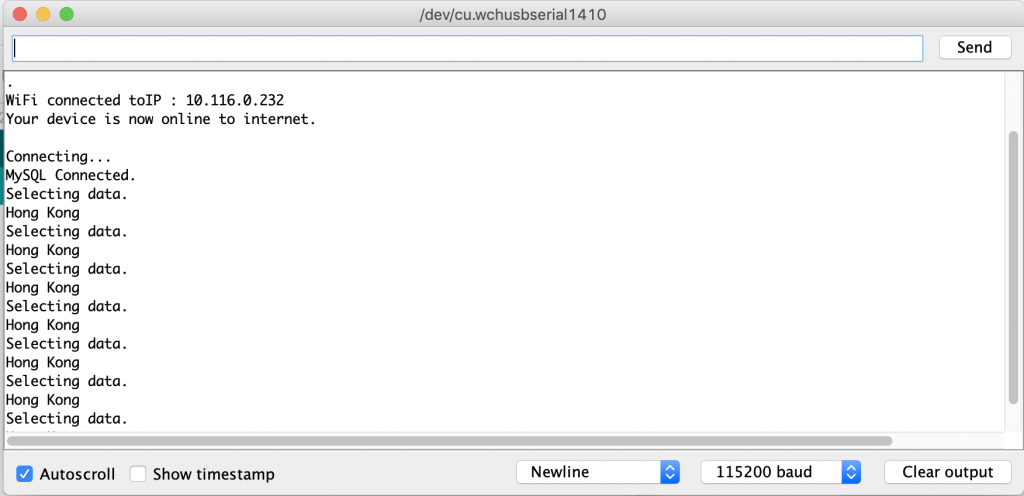
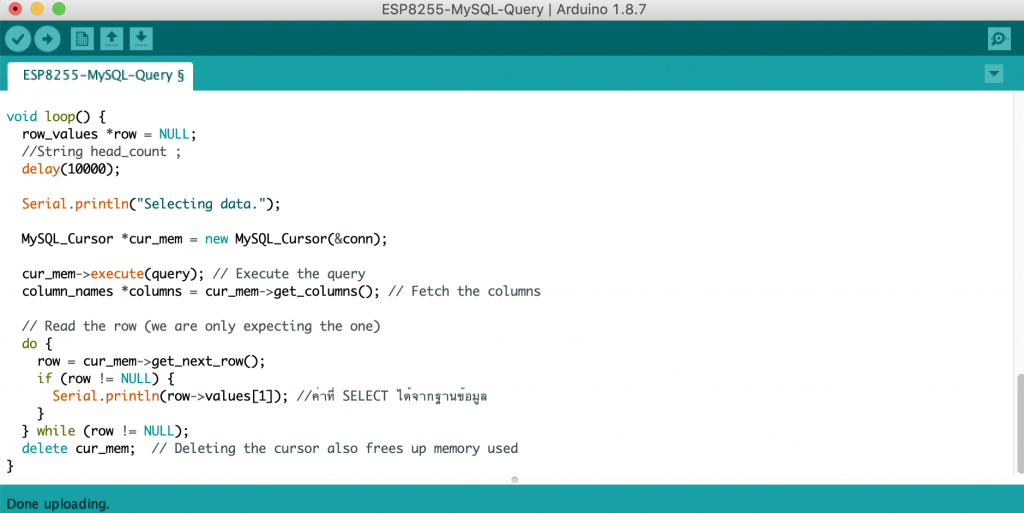
สำหรับโค้ดในส่วนของ Loop นั้นจะเป็นการ Query ตามเงื่อนไข “SELECT * FROM DBName.TableName WHERE id = ‘5’ ” ซึ่งค่าที่ได้คือชื่อเมืองที่มี id=5 นั่นเอง (สำหรับบทความนี้เป็นขั้นตอนการ Query แบบพื้นฐานที่สุด) ในตัวอย่างจะให้ทำการ Query วนลูปไปทุกๆ 10 วินาที
สามารถคัดลอกโค้ดทั้งหมดได้ที่นี่ครับ หรือ https://github.com/sujanepanjan/Arduino-Query-MySQL
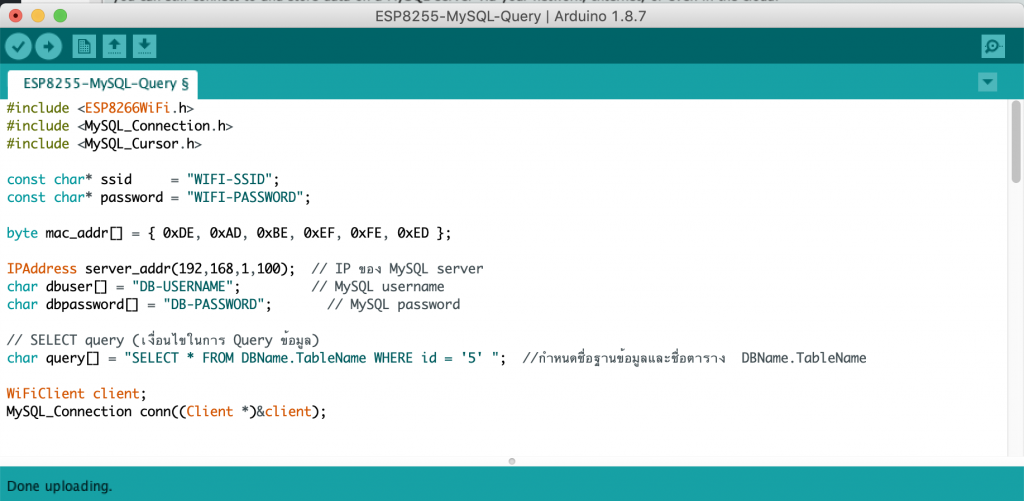
#include <ESP8266WiFi.h>
#include <MySQL_Connection.h>
#include <MySQL_Cursor.h>
const char* ssid = "WIFI-SSID";
const char* password = "WIFI-PASSWORD";
byte mac_addr[] = { 0xDE, 0xAD, 0xBE, 0xEF, 0xFE, 0xED };
IPAddress server_addr(192,168,1,100); // IP ของ MySQL server
char dbuser[] = "DB-USERNAME"; // MySQL username
char dbpassword[] = "DB-PASSWORD"; // MySQL password
// SELECT query (เงื่อนไขในการ Query ข้อมูล)
char query[] = "SELECT * FROM DBName.TableName WHERE id = '5' "; //กำหนดชื่อฐานข้อมูลและชื่อตาราง DBName.TableName
WiFiClient client;
MySQL_Connection conn((Client *)&client);
void setup() {
Serial.begin(115200);
delay(10);
// Connect to a WiFi network
Serial.println();
Serial.print("Connecting to ");
Serial.println(ssid);
WiFi.mode(WIFI_STA);
WiFi.begin(ssid, password);
while (WiFi.status() != WL_CONNECTED) {
delay(500);
Serial.print(".");
}
Serial.println("");
Serial.print("WiFi connected to ");
Serial.print("IP : ");
Serial.println(WiFi.localIP());
Serial.println("Your device is now online to internet.");
Serial.println("");
//MySQL Connection
Serial.println("Connecting...");
if (conn.connect(server_addr, 3306, dbuser, dbpassword)) {
delay(1000);
Serial.println("MySQL Connected.");
}
else
Serial.println("Connection failed.");
//conn.close();
}
void loop() {
row_values *row = NULL;
//String head_count ;
delay(10000);
Serial.println("Selecting data.");
MySQL_Cursor *cur_mem = new MySQL_Cursor(&conn);
cur_mem->execute(query); // Execute the query
column_names *columns = cur_mem->get_columns(); // Fetch the columns
// Read the row (we are only expecting the one)
do {
row = cur_mem->get_next_row();
if (row != NULL) {
Serial.println(row->values[1]); //ค่าที่ SELECT ได้จากฐานข้อมูล
}
} while (row != NULL);
delete cur_mem; // Deleting the cursor also frees up memory used
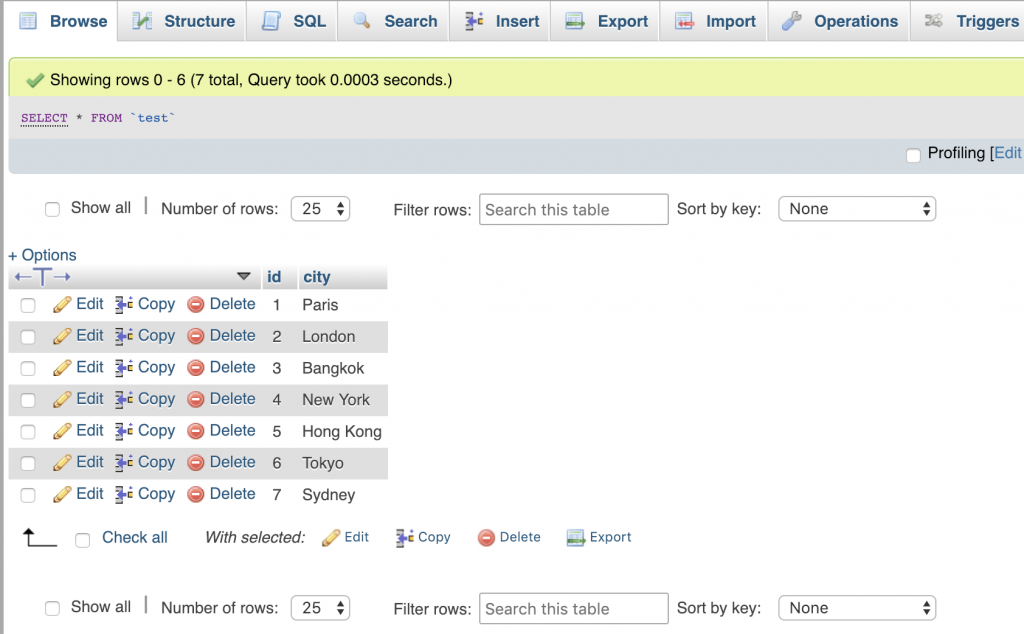
}ในส่วนของฐานข้อมูล เราสามารถสร้างตารางข้อมูลง่าย ๆ ขึ้นมาดังตัวอย่างเช่น
เมื่อทุกอย่างพร้อมให้ทำการ Upload โค้ดไปยังบอร์ด และเปิด Serial Monitor เพื่อดูค่าที่ได้ จากภาพคือระบบแสดงค่าชื่อเมือง ซึ่งก็คือ Hong Kong (id=5) นั่นเอง